Effective theater seating is a perfect blend of aesthetics, luxuriating comfort, and functionality. That is the principle we follow in building all our theater seating from the most reasonably priced to the most exclusive. A theater chair can be as much an expression of the customer’s inner self as any of the other elements of the theater. Customers are well advised to take time when considering their choice.


For more information including high-resolution pictures and basic chair dimensions, click here to download CDGi’s seating brochure.
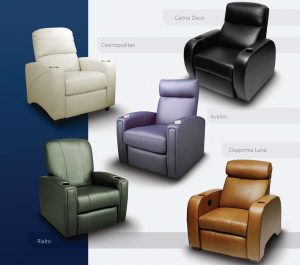
Product Configurator click here or the image to customize your own seats.